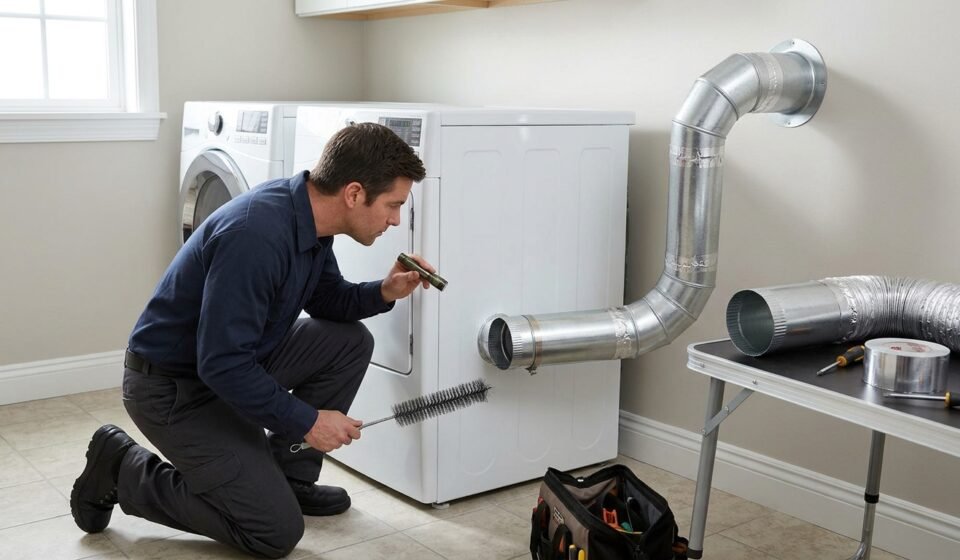

Dryer venting is the system that carries warm, moisture-filled air and lint from a clothes dryer to the outdoors. In a conventional vented dryer, this exhaust system helps remove moisture from clothing and supports efficient appliance operation.
A properly installed dryer vent also helps reduce the accumulation of lint inside the exhaust pathway. When the duct becomes restricted, the dryer may take longer to dry clothes, run hotter than intended, or require more maintenance.
A complete dryer vent system generally includes:
- Dryer exhaust outlet: The connection where air leaves the appliance.
- Transition duct: The short section connecting the dryer to the main exhaust duct.
- Exhaust duct: The pathway that carries air through the wall, floor, ceiling, or other permitted route.
- Exterior termination: The outdoor vent hood or approved outlet that allows exhaust air to escape while helping prevent pests and unwanted backflow.
Each component plays a different role. A suitable connector cannot compensate for a blocked duct, and a clean lint screen does not guarantee that the entire exhaust system is clear.
Types of Dryer Vent Ducts and Materials
Choosing the correct duct material is one of the most important parts of dryer venting. The appropriate material depends on where the duct is installed, the dryer manufacturer’s instructions, and applicable building requirements.
Rigid Metal Duct
Rigid metal duct, commonly made from galvanized steel or aluminum, is generally preferred for concealed dryer exhaust runs where permitted by the applicable code and appliance instructions.
Its smooth interior helps air move through the system with less resistance than many corrugated alternatives. It is also less likely to become crushed than a lightweight flexible hose.
Rigid duct should be assembled with compatible fittings and supported properly. Joints should be secured and sealed using methods appropriate for dryer exhaust systems. Screws or fasteners should not protrude into the airflow path where they can collect lint.
Semi-Rigid Metal Transition Duct
A semi-rigid metal transition duct can provide flexibility for connecting a dryer to the main exhaust duct. It is useful when the appliance must be moved for cleaning or when a small amount of adjustment is needed during installation.
However, semi-rigid duct is not automatically suitable for every concealed or long exhaust run. Its permitted use depends on the product listing, local requirements, and the dryer manufacturer’s instructions.
Keep the transition as short and straight as practical, and inspect it regularly for crushing, damage, or lint accumulation.
Flexible Plastic or Vinyl Duct
Plastic or vinyl accordion-style ducting should not be used for conventional dryer exhaust systems where prohibited by code or the appliance instructions. Such materials may be more vulnerable to damage, can trap lint in their corrugations, and may create additional fire-safety concerns.
Do not assume that a duct is suitable simply because it is sold as a general-purpose ventilation hose. Check that the product is specifically appropriate for the intended dryer application.
Choosing the Right Material
For most conventional installations, the starting point is an approved metal exhaust duct, with an appropriate transition connector at the appliance.
Before purchasing materials, verify the required duct diameter, permitted transition-duct type, connection method, and maximum allowable exhaust length in the manufacturer’s installation instructions.
How to Plan a Proper Dryer Vent Route
A well-planned vent route helps maintain airflow and makes future cleaning easier. Ideally, the exhaust duct should follow a short, direct path to an appropriate outdoor termination.
1. Choose a Practical Route
Identify the shortest practical route from the dryer’s exhaust outlet to the exterior. A straight path generally requires fewer fittings and creates fewer places where lint can accumulate.
In some homes, the duct must pass through a wall, floor, or ceiling. These arrangements may be acceptable when properly designed, but they require careful attention to duct length, elbows, accessibility, and local code.
2. Minimize Bends
Every elbow adds resistance to airflow. Avoid unnecessary turns and tight bends, especially immediately behind the dryer.
Where a bend is necessary, use a suitable fitting rather than crushing or sharply folding the transition duct. Follow the manufacturer’s instructions for calculating the effect of elbows on the allowable duct run.
3. Prevent Crushing and Kinking
Push the dryer into position carefully after connecting the transition duct. A hose that becomes flattened between the appliance and wall can restrict exhaust airflow.
Leave enough space for the connector to maintain its intended shape. If the laundry area is very tight, consider a suitable recessed vent box or approved space-saving connector that is compatible with the dryer.
4. Support and Connect the Duct Properly
Support the exhaust duct according to the installation requirements so that it does not sag excessively or separate at its joints.
Use suitable materials to connect and seal joints. Avoid arrangements that introduce unnecessary obstructions inside the duct or make future maintenance difficult.
5. Plan for Inspection and Cleaning
A route that is impossible to access can make maintenance more difficult. Where practical, design the system so that the transition duct can be inspected and the exhaust pathway can be cleaned without damaging walls or disconnecting unrelated equipment.
If the proposed route is unusually long, includes several bends, passes through difficult-to-access areas, or involves complicated construction, consult a qualified installer before proceeding.
Dryer Vent Length and Elbow Requirements
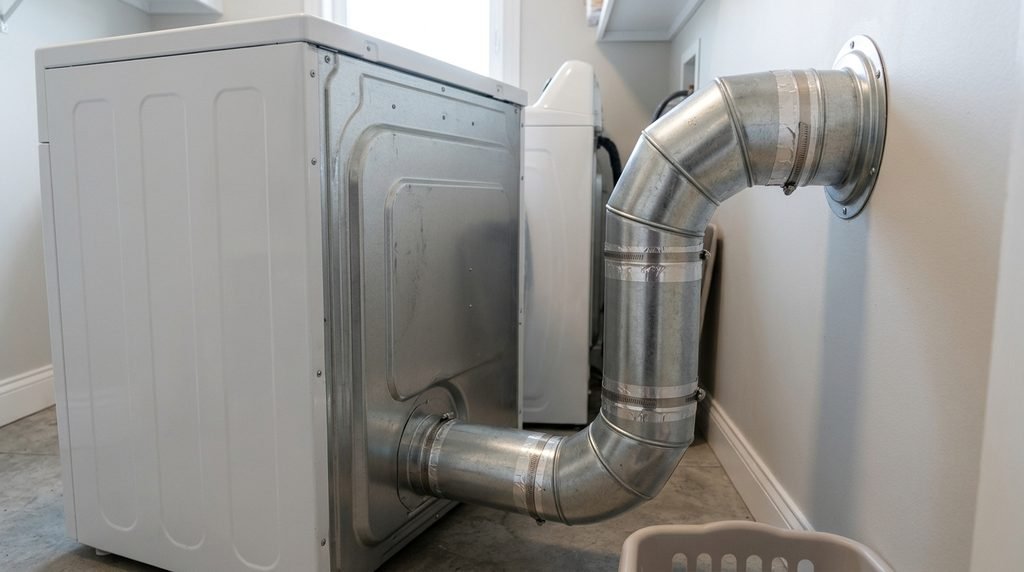
There is no single maximum dryer vent length that applies to every installation. The permitted length depends on the appliance, the duct diameter and material, the number and type of elbows, and the applicable code.
Some installation instructions specify a maximum developed duct length, while others require adjustments for fittings. A long duct with several elbows may exceed the permitted equivalent length even if the physical distance from the dryer to the outside appears reasonable.
What Is Equivalent Duct Length?
Equivalent length is a way of accounting for the extra airflow resistance created by fittings such as elbows. Rather than considering only the straight distance, the calculation accounts for the configuration of the entire exhaust route.
For example, a duct that travels a relatively short distance but includes several sharp bends may create more resistance than a longer, straighter route. The correct calculation must use the method and fitting allowances specified by the applicable code or manufacturer.
How to Check Your Permitted Length
Before installing a new duct or extending an existing one:
- Locate the installation manual for your exact dryer model.
- Confirm the specified duct diameter and permitted materials.
- Identify the manufacturer’s method for measuring duct length.
- Count the elbows and other fittings in the proposed route.
- Check the applicable local building requirements.
- Adjust the route if it exceeds the permitted limits.
The International Residential Code includes provisions for dryer exhaust duct construction and length calculations, but the adopted edition and local amendments can differ. Do not rely on a number copied from an older online guide without checking whether it applies to your installation.
Where Should a Dryer Vent Terminate?
A conventional vented dryer should discharge exhaust air to an appropriate outdoor location through a properly installed termination.
Venting into an attic, crawl space, wall cavity, garage, or occupied room is generally inappropriate for a conventional dryer exhaust system. Moisture and lint can accumulate in unintended spaces, while the exhaust may affect indoor conditions and create maintenance problems.
Features of a Suitable Exterior Outlet
The exterior termination should be compatible with the exhaust duct and designed to allow air to escape without unnecessary restriction.
Depending on the approved product and applicable requirements, it may include a hood and a backdraft damper that opens during operation and closes when the dryer is not running.
The outlet should remain clear of lint, debris, snow, vegetation, and other obstructions. Its placement should also comply with applicable requirements for clearances from openings and other building features.
Avoid adding a fine mesh screen unless the specific application and applicable requirements permit it. Screens can collect lint and obstruct airflow.
Can a Dryer Vent Through the Roof?
A roof termination may be possible in certain installations, but it requires a suitable route, an appropriate termination, and compliance with the appliance instructions and local requirements.
A roof route may introduce additional bends, increase the difficulty of cleaning, or create access challenges. Before choosing this option, confirm the permitted duct length, termination design, weather protection, and maintenance requirements.
A qualified installer can help determine whether a roof route is appropriate for the specific home and dryer.
How to Check and Maintain a Dryer Vent
Routine maintenance helps keep the exhaust system clear and can reveal problems before they become more serious. The appropriate inspection and cleaning frequency depends on dryer use, duct length, the amount of lint produced, and the manufacturer’s guidance.
Clean the Lint Screen Regularly
Remove lint from the dryer’s lint screen before or after each load, following the manufacturer’s instructions. A blocked screen can affect airflow and drying performance.
If the screen appears coated with residue from fabric softeners or dryer sheets, consult the manual for the correct cleaning method. Allow it to dry fully before reinstalling it.
Inspect the Transition Duct
Periodically check the connector behind the dryer for crushing, holes, loose joints, and lint buildup. Disconnect the appliance safely before inspecting or cleaning areas that require moving the dryer.
Avoid pulling or twisting the duct forcefully, as this can damage the connection or separate the exhaust pathway.
Check the Exterior Vent
With the dryer operating, where it is safe to do so, observe whether air exits the outdoor termination. A flap that does not open normally or an outlet covered in lint may indicate a restriction.
This simple observation is not a complete airflow test. A dryer can still discharge some air even when part of the system is obstructed.
Arrange Periodic Duct Cleaning
Lint can accumulate inside the exhaust duct over time. Inspect the system periodically and clean it as needed, following the manufacturer’s recommendations and the conditions of the installation.
Long ducts, multiple bends, heavy dryer use, or repeated signs of restricted airflow may require more frequent attention. For inaccessible or heavily obstructed ducts, professional cleaning may be the safest option.
Common Dryer Venting Problems and Solutions
Dryer performance problems do not always mean the appliance itself is defective. Restricted exhaust airflow is one possible cause, so it is worth checking the vent system when drying times change unexpectedly.
Clothes Take Too Long to Dry
Possible causes include a blocked lint screen, a crushed transition duct, a clogged exterior outlet, or lint accumulated inside the exhaust duct.
Start with the lint screen and visible sections of the connector. Check the exterior termination for obvious obstruction. If the problem persists, arrange a more thorough inspection of the exhaust system.
Other appliance problems can also cause slow drying, so do not assume that every performance issue is caused by the vent.
The Dryer or Laundry Area Becomes Unusually Hot
Excessive heat may be associated with restricted airflow or another appliance fault. Stop using the dryer if it shows signs of overheating, a burning smell, smoke, or unusual scorching. Disconnect power when it is safe to do so and arrange qualified inspection.
If you have a gas dryer and suspect a gas leak, leave the area and follow the appropriate emergency guidance rather than attempting a repair.
The Exterior Damper Does Not Open Properly
Lint, debris, a damaged damper, or a restricted duct may prevent the outlet from operating as intended. Inspect the accessible exterior area and remove visible debris only if it is safe.
Do not force a damaged flap or install a replacement that is incompatible with the dryer exhaust system. If airflow remains poor, the entire route may need to be inspected.
The Transition Duct Keeps Getting Crushed
A dryer positioned too close to the wall can flatten the connector. This may be resolved by adjusting the appliance position or using a compatible recessed vent box or space-saving connector.
The replacement must fit the dryer and maintain an approved exhaust pathway. A compact connector does not make an otherwise unsuitable duct route acceptable.
Space-Saving Dryer Vent Options
Laundry rooms sometimes have limited clearance behind the dryer. Several accessories can help manage the connection, but each serves a specific purpose.
Recessed Dryer Vent Boxes
A recessed vent box provides space for the transition duct behind the appliance. By moving the connection into the wall cavity where permitted, it can help reduce the chance of crushing the duct.
The box must be appropriate for the installation, and the surrounding wall construction and exhaust route must meet applicable requirements.
Periscope-Style Connectors
Periscope-style connectors use a flatter or adjustable shape to connect the dryer with the wall outlet when space is restricted. They may be useful in certain laundry layouts, provided the product is approved for the application and installed according to its instructions.
Measure the available clearance and the location of the dryer outlet before selecting one.
Magnetic Dryer Vent Connectors
Magnetic connectors are designed to make the connection between a compatible dryer and vent outlet easier to align or disconnect. Some products are marketed for tight spaces where the appliance sits close to the wall.
They can be convenient, but compatibility and installation details matter. Check the product specifications, the dryer’s exhaust configuration, and the manufacturer’s instructions before purchasing.
Four-Way Dryer Vent Kits
Some dryers support kits that redirect exhaust through a side or bottom opening instead of the standard rear outlet. These kits are model-specific and may require additional installation steps.
Verify the exact model compatibility and required clearances. A directional kit changes where exhaust leaves the appliance; it does not eliminate the need for a properly installed duct leading outdoors.
Frequently Asked Questions
1. What type of duct is best for dryer venting?
Rigid metal duct is generally preferred for the main exhaust run where permitted by the applicable code and dryer instructions. A suitable semi-rigid or other approved transition duct may be used for the short appliance connection. Always verify the permitted materials for your particular dryer and installation.
2. How long can a dryer vent be?
The maximum allowable length varies according to the dryer model, duct configuration, fittings, and applicable code. Check the installation manual and use the required method for accounting for elbows and other fittings. Avoid relying on a universal maximum taken from an unrelated installation.
3. Can a dryer vent into an attic or garage?
A conventional vented dryer should discharge outdoors through an appropriate termination, rather than into an attic, crawl space, wall cavity, or occupied area. Follow the appliance instructions and local code for the correct exhaust route.
4. How often should a dryer vent be cleaned?
Clean the lint screen before or after each load according to the manufacturer’s instructions. Inspect the exhaust system periodically and arrange duct cleaning as needed, based on usage, lint accumulation, the duct layout, and the manufacturer’s recommendations.
5. Why does my dryer take longer to dry clothes?
Possible causes include a dirty lint screen, a crushed transition duct, a blocked exterior outlet, lint buildup inside the exhaust duct, or an appliance fault. Check accessible areas safely and arrange professional inspection if the problem persists or the dryer shows signs of overheating.
Conclusion
Proper dryer venting supports effective moisture removal, airflow, and safer appliance operation. Choose suitable duct materials, keep the route as direct as practical, account for elbows and permitted length, and make sure the exhaust terminates outdoors through an appropriate outlet. Regular lint-screen care and periodic vent inspection can help identify restrictions early. When installation requirements are unclear or the duct is inaccessible, consult the manufacturer’s instructions and a qualified professional rather than relying on a universal rule.
Related Post



[…] guide explains what to check before connecting a gas dryer, how the installation process works, which safety precautions matter most, and when to hire a […]
[…] Dryer Venting – Installation, Materials, Safety, and Maintenance Guide! […]