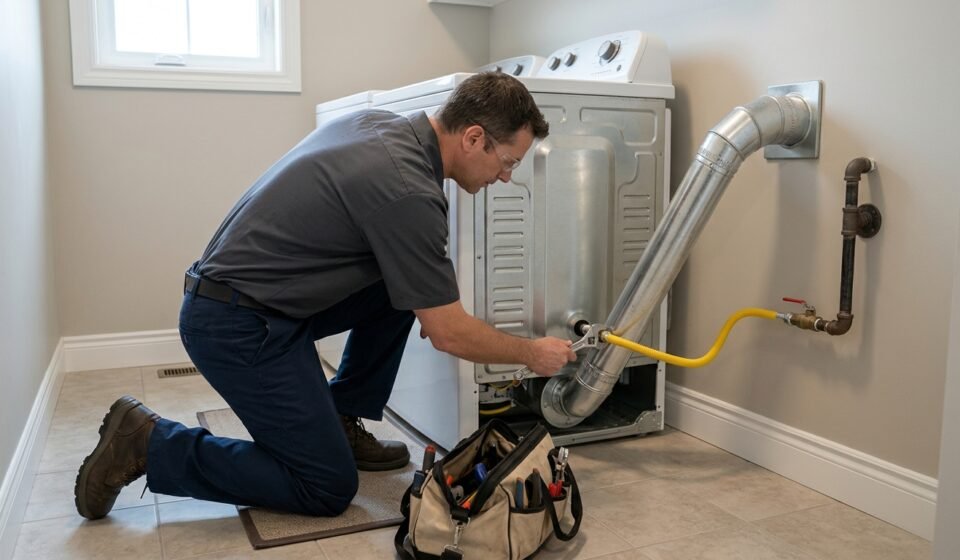

Connecting a gas dryer involves more than attaching a hose. You must ensure that the appliance is compatible with your home’s gas supply, the correct connector and shutoff valve are available, the electrical supply meets the manufacturer’s requirements, and the exhaust vent is installed properly.
If your laundry area already has an approved gas hookup, replacing an existing dryer may be relatively straightforward for a qualified installer. However, installing a new gas line, modifying gas piping, or converting the appliance to another fuel type requires additional expertise and may be legally restricted to qualified professionals.
This guide explains what to check before connecting a gas dryer, how the installation process works, which safety precautions matter most, and when to hire a professional.
Can You Connect a Gas Dryer Yourself?
Whether you can connect a gas dryer yourself depends on your experience, the existing connections, the appliance manufacturer’s instructions, and local regulations.
If the laundry area already has a suitable gas supply, shutoff valve, electrical outlet, and exhaust vent, the installation may require fewer modifications. Nevertheless, the gas connection must be compatible with the dryer and installed according to the manufacturer’s instructions and applicable safety requirements.
Consider hiring a qualified professional if:
- Your laundry area does not have an existing gas supply.
- The gas pipe or shutoff valve needs modification.
- You are unsure whether the connector is compatible.
- The dryer requires conversion between natural gas and propane.
- You cannot confidently verify the installation requirements.
- Local rules require a licensed gas installer.
A plumber, gas fitter, or appliance installer may be appropriate depending on the work and local licensing requirements. Confirm that the person you hire is qualified to perform the specific gas work involved.
Important: Never improvise a gas connection or force incompatible fittings together. If you are uncertain about any part of the installation, stop and obtain professional assistance.
What to Check Before Connecting a Gas Dryer
Preparing the installation area can help prevent compatibility problems, delays, and unnecessary expenses.
1. Confirm the Dryer’s Gas Type
Gas dryers are designed for a specified fuel, commonly natural gas or propane, also called liquefied petroleum gas (LP) in some markets.
Check the appliance rating plate and installation manual to identify the approved fuel type. Do not assume that a dryer designed for one fuel can be connected directly to another.
Some models support an approved conversion kit, but the conversion must follow the manufacturer’s requirements and applicable regulations. Have a qualified technician handle the conversion if required.
2. Inspect the Existing Gas Supply
If you are replacing an old dryer, confirm that the existing gas hookup is suitable for the new appliance. The presence of a pipe or shutoff valve does not automatically mean the connection meets the new dryer’s requirements.
A qualified installer should assess the gas supply, valve, connector, fittings, and capacity where necessary.
Do not loosen fittings, disconnect a gas line, or attempt to determine whether a line is live by trial and error. Gas-supply work should be performed using the appropriate procedures and equipment.
3. Check the Electrical Requirements
A gas dryer still needs electricity to operate components such as its controls, drum motor, and ignition system.
Check the installation manual for the required voltage, outlet type, grounding, and electrical specifications. Do not assume that every gas dryer uses the same electrical connection.
Avoid extension cords or adapters unless the manufacturer specifically permits them. If the available outlet does not match the appliance requirements, consult a qualified electrician.
4. Plan the Exhaust Vent
Most conventional gas dryers must exhaust air outdoors through an appropriate vent system. Follow the installation manual for the permitted duct material, diameter, maximum length, bends, clearances, and termination requirements.
Before installation, check that:
- The exhaust route is suitable for the dryer model.
- The duct will not be crushed behind the appliance.
- The outlet terminates at an approved location.
- The duct and exterior termination are free of obstructions.
- The installation allows adequate airflow and access for maintenance.
A blocked or incorrectly installed exhaust can reduce drying performance and increase fire and moisture risks. Do not direct the exhaust into an enclosed room, attic, or other unsuitable space.
5. Measure the Installation Space
Measure the width, depth, and height of the laundry area, including the space needed for hoses, the exhaust duct, the gas connection, and appliance access.
Check the manufacturer’s requirements for rear clearance, side clearance, ventilation, and any restrictions involving cabinets or enclosed laundry closets.
Leave enough room for the dryer to be moved into position without crushing the exhaust duct or placing stress on the gas connection.
What Do You Need for a Gas Dryer Installation?
The exact equipment depends on the dryer model, the existing hookup, and local requirements. The following list describes common items to discuss with your installer.
- Compatible gas connector: An approved connector suitable for the appliance, fuel type, and installation conditions.
- Suitable shutoff valve: A valve that meets applicable requirements and allows the gas supply to be isolated as specified.
- Compatible fittings and sealing materials: Components appropriate for the gas system and approved for the intended use.
- Electrical supply: The outlet and grounding arrangement required by the manufacturer.
- Exhaust duct and termination: Components approved for the dryer and the intended vent route.
- Leveling equipment: Tools or adjustments needed to position the appliance correctly.
- Manufacturer’s installation manual: The primary reference for model-specific requirements.
Do not purchase fittings based only on appearance or assume that an old connector can always be reused. Compatibility, condition, local rules, and the manufacturer’s instructions determine which parts are suitable.
For a new gas line or a modified supply, the installer may need additional materials, permits, inspections, and testing equipment.
How Gas Dryer Installation Works
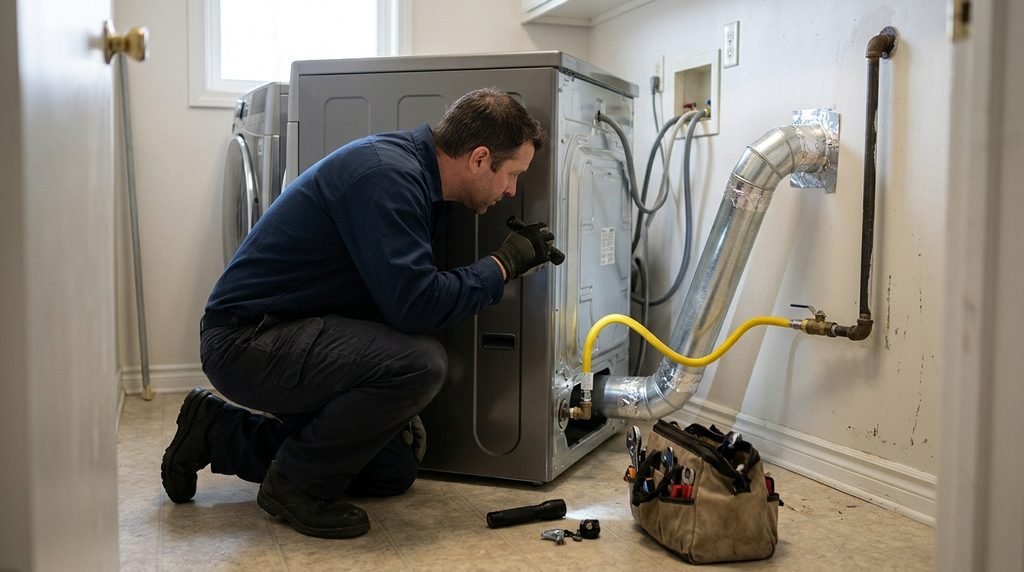
Gas dryer installation should follow the manufacturer’s instructions and local safety requirements. The following overview explains the main stages without replacing the model-specific procedures needed to make a gas connection.
Step 1: Prepare the Installation Area
Remove obstructions, confirm the appliance dimensions, and make sure the intended location meets the manufacturer’s clearance and ventilation requirements.
If replacing an existing dryer, have the old appliance disconnected safely before moving it. Do not attempt to remove a gas connector or alter the supply line if you are not qualified to do so.
Step 2: Verify the Gas Connection and Shutoff Valve
Before installation proceeds, the appropriate installer should verify that the gas supply, shutoff valve, connector, and appliance specifications are compatible.
If the gas supply is missing, damaged, incorrectly positioned, or unsuitable, the work should stop until the issue is corrected by a qualified professional.
Never force fittings to match or substitute an unapproved connector. The correct arrangement depends on the dryer model, fuel type, and applicable requirements.
Step 3: Connect the Gas Supply
The gas connection must be made according to the appliance manufacturer’s instructions and applicable local codes. The correct components, sealing methods, connection procedures, and testing requirements can differ by installation.
Because an incorrectly assembled connection can cause a gas leak, anyone who is not qualified to carry out this work should leave it to an appropriately licensed or otherwise authorized gas professional.
Do not use an open flame to check for leaks. The installer should verify gas tightness using an approved method before the appliance is placed into service.
Step 4: Connect the Electrical Supply
Once the required electrical supply has been confirmed, the dryer should be connected according to its installation manual.
The outlet, voltage, grounding, and any other electrical requirements must match the appliance specifications. If the electrical setup is unsuitable, have a qualified electrician correct it rather than improvising with adapters or extension cords.
Step 5: Install the Exhaust Vent
Fit the exhaust system according to the manufacturer’s requirements. The duct should be appropriately supported and routed without crushing, unnecessary restrictions, or prohibited materials.
Make sure the exterior termination is suitable and unobstructed. Do not cover the exhaust outlet or direct dryer exhaust into an enclosed space.
A correctly installed vent supports effective drying and helps reduce the risk of lint accumulation, overheating, and moisture problems.
Step 6: Position and Level the Dryer
Carefully move the appliance into its final position. Avoid trapping the exhaust duct, placing strain on the gas connector, or damaging the electrical cord.
Adjust the leveling feet according to the manufacturer’s instructions. Confirm that the dryer is stable and that the installation clearances are maintained.
If the appliance cannot be positioned without putting pressure on its connections, stop and have the layout corrected.
Step 7: Complete the Safety and Operating Checks
Before the dryer is used, the installer should confirm that the gas connection has been checked using an approved leak-testing method, the exhaust is properly installed, and the electrical supply meets the appliance requirements.
The final checks should also follow the manufacturer’s instructions for operating the dryer and confirming normal function.
Do not operate the appliance if there is a suspected leak, an unusual gas smell, a damaged connection, an abnormal flame where visible, or an exhaust problem. Stop and obtain qualified assistance.
Gas Dryer Venting and Electrical Requirements
Gas dryers need both a suitable exhaust arrangement and the specified electrical supply. These are separate requirements from the gas connection.
Why Proper Venting Matters
An incorrectly installed exhaust duct can restrict airflow, cause excessive heat, increase drying times, and allow moisture or lint to accumulate in unsuitable locations.
Use the duct type and configuration permitted by the manufacturer’s manual. Flexible foil or plastic ducting may be prohibited for certain installations, so do not select a material based on convenience alone.
Clean lint from the lint screen as directed, and maintain the exhaust system at the recommended intervals. If drying times increase significantly or the dryer overheats, stop using it until the airflow problem has been investigated.
Why Electricity Is Still Necessary
Although a gas dryer uses gas to generate heat, electricity operates its other systems. A compatible outlet and proper grounding are therefore essential.
Check the specific appliance requirements before connecting the power supply. If your outlet or wiring does not match the manual, seek advice from a qualified electrician.
How to Check for Safety Problems After Installation
A completed installation should be checked carefully before regular use. Do not rely solely on the fact that the dryer starts or produces heat.
The installer should verify the gas connection using an approved method, confirm the exhaust route, and follow the manufacturer’s commissioning and operating instructions.
Watch for problems such as:
- A gas smell near the appliance or gas connection.
- Damaged, strained, or visibly unsuitable connectors.
- A crushed or obstructed exhaust duct.
- Unusual overheating or persistent drying problems.
- Electrical damage, sparking, or abnormal operation.
What If You Smell Gas?
If you smell gas or suspect a leak, do not continue the installation or attempt to troubleshoot the connection yourself.
- Leave the affected area and get other occupants to a safe location.
- Do not operate electrical switches, use flames, or do anything that could create an ignition source.
- From a safe location, contact your gas supplier or the appropriate emergency service and follow its instructions.
- Do not use the dryer again until the suspected problem has been assessed and the installation has been declared safe.
Do not attempt to find the leak with a match, lighter, or other flame. Gas safety takes priority over completing the installation.
When Should You Hire a Professional?
Professional installation is particularly important when a job involves new gas piping, relocating a gas appliance, changing fuel type, repairing a valve, or diagnosing a suspected leak.
You should also seek help when the connector or gas supply does not match the appliance, the installation manual is unclear, or local regulations require a qualified installer.
Before hiring someone, ask whether they are authorized to perform the specific work in your area. Request an estimate that separates labor, materials, permits, inspection charges, and any additional work that may be required.
If you are replacing an existing dryer, explain what connections are already available and provide the model number of the new appliance. This helps the installer determine what needs to be checked before the appointment.
How Much Does It Cost to Connect a Gas Dryer?
The cost of connecting a gas dryer depends on the installation rather than the appliance alone.
Common factors include:
- Whether an approved gas hookup already exists.
- Whether the gas line or shutoff valve needs modification.
- The connector and venting materials required.
- The accessibility of the installation area.
- Electrical changes, if necessary.
- Local permit, inspection, and labor charges.
- Whether fuel conversion or additional work is needed.
Replacing a dryer where suitable connections already exist may require less work than installing a new gas line in a laundry area that has never had one. However, the final price depends on the condition of the existing setup and local requirements.
Obtain a written estimate before authorizing work. Ask what is included, whether any inspection or permit fees apply, and whether additional repairs would require your approval.
Avoid choosing a contractor based on price alone. Appropriate qualifications, correct installation, and verified safety are more important than the lowest initial quote.
Frequently Asked Questions
1. Can I connect a gas dryer myself?
It depends on the existing installation, your qualifications, the manufacturer’s instructions, and local regulations. Connecting a replacement appliance where approved hookups already exist is different from modifying gas piping or installing a new line. If you are not qualified to perform the gas work, hire an authorized professional.
2. Does a gas dryer need electricity?
Yes. A gas dryer uses electricity for components such as the motor, controls, and ignition system. Check the manufacturer’s manual for the required voltage, outlet type, and grounding. Never assume every model has the same electrical requirements.
3. Can I reuse an old gas dryer connector?
Not automatically. The connector must be suitable for the new appliance, compatible with the gas type, in acceptable condition, and permitted by the manufacturer’s instructions and local rules. Have a qualified installer assess the existing connector before deciding whether it can remain in use.
4. Does a gas dryer need an outdoor vent?
Most conventional gas dryers require an exhaust system that discharges outdoors. The approved duct material, routing, length, and termination depend on the appliance and local requirements. Follow the installation manual rather than directing exhaust into an enclosed room or another unsuitable location.
5. What should I do if I smell gas after connecting a dryer?
Stop the installation and leave the affected area. Avoid flames, electrical switches, and other possible ignition sources. Contact the gas supplier or appropriate emergency service from a safe location and follow its instructions. Do not operate the dryer again until the suspected leak has been professionally assessed and the installation is safe.
Conclusion
To connect a gas dryer safely, you must confirm fuel compatibility, check the existing gas supply, meet the electrical requirements, and install an appropriate exhaust system. An existing hookup may simplify a replacement, but it does not eliminate the need to verify that the connections are suitable for the new appliance.
Follow the manufacturer’s installation manual and applicable local regulations, and leave gas-line modifications or uncertain connections to a qualified professional. A careful assessment before installation can help prevent leaks, avoid unnecessary expenses, and ensure that the dryer operates safely.
Related Post


[…] it is safer to air-dry shoes. Some shoes may be suitable for machine drying, but only when the footwear manufacturer permits it and your tumble dryer provides an appropriate drying […]
[…] Connect Gas Dryer – Safety, Requirements, and Installation! […]